


เหตุผลที่ควรเลือกซื้อ ประกันรถยนต์ชั้น 1
สำหรับใครที่กำลังลังเลใจว่าจะเลือกซื้อรูปแบบความคุ้มครองประกันรถยนต์ประเภทไหนวันนี้คุณสามารถเข้ามาทำความรู้จักกับประกันรถยนต์ชั้น 1 ซึ่งเป็นหนึ่งในรูปแบบความคุ้มครองที่ครอบคลุมที่สุดดีที่สุดของประกันรถยนต์ ถ้าคุณสนใจก็สามารถเข้ามาดูรายละเอียดเพิ่มเติมได้ที่หน้าเว็บ mrkumka พอมีช่องทางการเลือกซื้อประกันรถยนต์ชั้น 1 ให้คุณได้ลองเข้ามาทำความรู้จักเพื่อที่จะช่วยทำให้คุณสามารถเลือกซื้อรูปแบบความคุ้มครองได้ตอบโจทย์และตรงกับความต้องการมากที่สุดเอาเป็นว่าหากใครสนใจหรือยังลังเลใจว่าจะเลือกซื้อประกันรถยนต์ชั้น 1 ได้หรือไม่ลองมาดูเหตุผลที่จะช่วยทำให้คุณตัดสินใจเลือกซื้อรูปแบบความคุ้มครองได้ง่ายมากขึ้นกันก่อนได้เลย เหตุผลสำคัญที่จะต้องซื้อประกันรถยนต์ชั้น 1 สำหรับคนที่ยังลังเลใจว่าจะตัดสินใจเลือกซื้อประกันรถยนต์ชั้น 1 ...


เพลงมีกี่ประเภทกันนะ
ว่ากันด้วยเรื่องของ “เพลง” ถือได้ว่าไม่มีใครไม่เคยได้สัมผัสอย่างแน่นอน เพราะเพลงนั้นเป็นสิ่งที่ควบคู่กับมนุษย์เรามาอย่างช้านาน มีการสอดแทรกศิลปะและวัฒนธรรมผ่านเสียงเพลงมาอย่างเนิ่นนานตั้งแต่อดีตจนถึงปัจจุบัน อีกทั้งเพลงยังมีประโยชน์มากมายจนในบางครั้ง เราก็อาจจะคาดไม่ถึงว่าจะได้รับสิ่งดีๆ จากการฟังเพลงอีกด้วยหล่ะครับ บทความนี้จะพาทุกๆ ท่านไปทำความรู้จักกับ “เพลง” และ “ศึกษาประเภทของเพลงต่างๆ ” ...

5 เพลง country ที่ได้ฟังเมื่อไหร่ก็ต้องนึกถึงวันวาน
ว่ากันด้วยเรื่องของแนวเพลงในปัจจุบันกับสมัยก่อนนั้น มีการเปลี่ยนแปลงและพัฒนาการต่างๆ มากมายเลยก็ว่าได้ครับ ยุคก่อนอาจจะเป็นเพลงที่ความหมายตรงตัว ฟังได้สบายๆ แต่ยุคนี้จะมีเรื่องศิลปะเข้ามาทำให้เกิดเป็นเพลงแนวใหม่ที่เกิดขึ้นเป็นจำนวนมาก แต่ในวันนี้เราจะขอพาทุกๆ ท่านย้อนวันวานไปพบกับ “5 เพลง country ที่ได้ฟังเมื่อไหร่ก็ต้องนึกถึงวันวาน” กันครับ จะมีเพลงใดบ้างนั้น…เราไปชมกันดีกว่าครับ ...

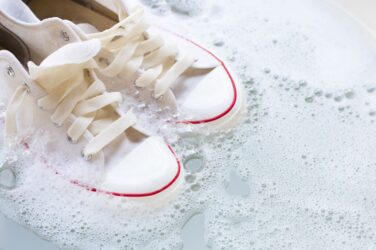
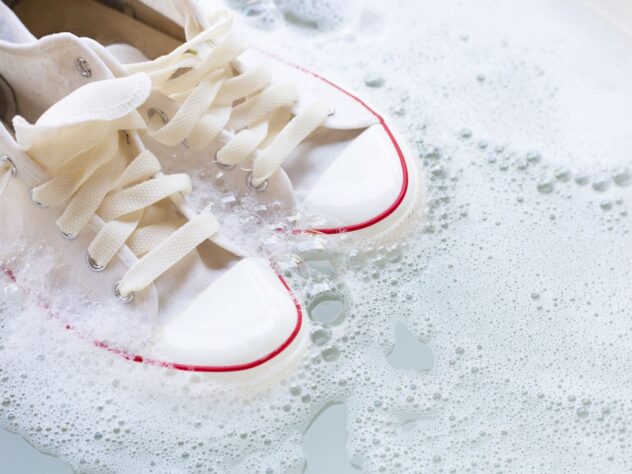
วิธีการดูแลทำความสะอาดรองเท้าผู้หญิง
รองเท้าเป็นไอเทมที่ทั้งหนุ่มๆ และสาวๆ ต่างก็ต้องสวมใส่ออกไปทำกิจกรรมต่างๆ ซึ่งจะต้องเดินผ่านหลากหลายภูมิทัศน์ที่มีทั้งที่สะอาดๆ ปราศจากฝุ่นหรือบางครั้งก็ต้องลุยโคลนลุยน้ำฝนกันก็พบเห็นกันได้บ่อยๆ ครับ วันนี้เราเลยอยากมาแชร์เกี่ยวกับ “วิธีการดูแลทำความสะอาดรองเท้าผู้หญิง” ที่รองเท้าผู้ชายก็สามารถใช้แนวทางเดียวกันในการดูแลรองเท้าได้เช่นกันครับ จะเป็นอย่างไรกันบ้างนั้น…เราไปชมกันเล้ยย วิธีการดูแลทำความสะอาดสำหรับหนุ่มสาวที่สามารถทำตามได้ง่ายๆ แนะนำ 3 รองเท้าผ้าใบนิยมตลอดกาลในหมู่วัยรุ่นทั่วโลก ...

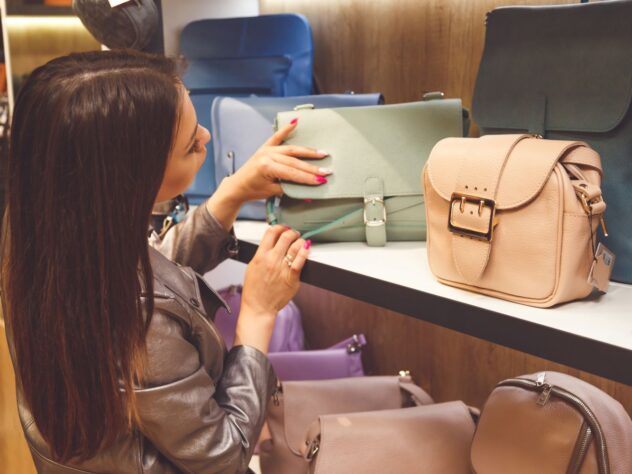
สื่อส่งเสริมการขาย ณ จุดขาย ยอดนิยม มีอะไรบ้าง
กลยุทธ์ที่นำมาใช้เพื่อโฆษณา/ประชาสัมพันธ์สินค้าและองค์กรมีมากมายหลายวิธี ซึ่งการใช้สื่อส่งเสริมการขาย ณ จุดขายถือเป็นอีกหนึ่งวิธีที่ได้รับความนิยม นั่นก็เพราะเป็นสื่อที่ช่วยดึงดูดความสนใจได้ดีจนสามารถทำให้ผู้บริโภคจำนวนไม่น้อยตัดสินใจซื้อสินค้าในที่สุด ปัจจุบันนี้สื่อประเภทนี้มีอยู่ด้วยกันหลายประเภทมาก พบเห็นกันได้บ่อยตามห้างสรรพสินค้า ร้านสะดวกซื้อและร้านค้าทั่วไป แต่ว่าจะมีอะไรกันบ้างนั้น ต้องมาดูกัน ประเภทของสื่อส่งเสริมการขาย ณ จุดขาย ...